sábado, 28 de marzo de 2020

Op Compass Game 7 - Sandstorm


Lumbering Matildas slowly crossing the Desert whilst sand swirls around the troops as they advance into the unknown, would adequately describe Game 7 of our ongoing Op Compass Campaign and what follows is the Scenario and AAR.

Italian troops wait for something to emerge from the Sandstorms 
If you want more information on the Campaign I have set up a separate page which is updated regularly with updates on rules along with links to all the previous games,

https://yarkshiregamer.blogspot.co.uk/2018/04/opcompass-1940-resource-page.html


The games are based on an excellent book by Robert Avery which is available from The Toofatlardies, there is a direct link to purchase the
book on the Resource Page.We use 28mm figures with this scenario taking place on an 8 x 6 table using a home brew set of rules, based on Iron Ivans Disposable Hero's.


Ratty and Mole discuss their latest adventures
Historical Background 

Its the 10th December 1940, the previous day (see our recent games) the Italian Forts at Tummar fell, the British Forces moved onto the Sidi Barrani position. Part of the force was detailed to take a small hamlet known as Alam el Dab.

The weather was appalling, a high wind whipping up sand and dust into a constantly changing fog / sandstorm, visibility rapidly changing minute by minute. As the British advanced the cloud of dust lifted long enough for the Italian Artillery to destroy the approaching lorries, the British Infantry helpless, only able to watch as their lift home disappeared.


Italian 75mm Field Gun
As quick as the visibility increased it dropped back to nothing, the British troops now supported by their old friends the Matildas of 7RTR swept forward into a cloud of dust towards where they believed the Italians to be.

Table Set Up and Terrain 

This battle is fought over an 8 x 6 table. The game begins with the Italian positions hidden.


Table Set Up
You should just be able to see on the table a series of yellow dots, these are dividing up the table into 24 equal squares to help with plotting positions and artillery. The terrain is random scrub and rocky outcrops with a single building representing the position of Alam el Dab.

The following Special Rules are in force (see Resource Page for full details),

Difficult Going and Breakdown.

New Rule - Variable Visibility - to represent the fluidity of the distance troops could see in this battle Visibility is limited to 9" plus 1d10 inches. Visiblity is determined once at the start of a new turn and again on the turn of an event card, giving a maximum of 3 and a minimum of 1 change in Visibility per turn. Whilst in force all firing is considered to be at long range.

Spoiler - The Brits have a secret objective, the game ends when they take all three gun positions, the British players should not know this until the game ends.


British Briefing

Italian Artillery has once again proven it's worth, take you troops into the mist and capture their positions. Be careful, the sand is soft, our tanks break down and visibility can change at any time.

Best suited for 3 players. Each Task Force has the following,

1 x Matilda Infantry Tank
1 x British Infantry Company consisting of,
HQ Section with 1 x Officer, 1 x Radio Operator and 1 x Sgt with SMG
Support Section with 1 x 2 man 2" Mortar Team and 1 x 2 man Boyes AT Team
3 x Infantry units of 1 x Sgt with SMG, 1 x Bren Gun and loader plus 7 Privates with Rifles

So 3 tanks and 111 men to get the job done. One TF will start in the centre of the table whilst the others will start equidistant from the centre tank and the table edge.


Advance into the unknown
Italian Briefing 

Once again you find yourself trapped in a difficult position with the seemingly unstoppable Matildas heading towards you. This time you have the advantage of cover and limited Visiblity, hold on as long as you can and cause as much casualties to the attackers as you can. Defend your guns to the last.


Your forces consist of,

1 HQ Section of Officer and Radio Operator 
8 "Blackshirt" units each with 1 Sgt with SMG, 1 x 2 man LMG Team and 7 Rifles.
1 x 65mm Gun and 3 crew
1 x 75mm Field Gun and 4 crew
1 x 100mm Field Gun and 4 crew.


The above photo shows the layout of the Italian positions, only place the terrain and troops on table once they are visible, the Italian player chooses where in the line their three gun pits go.

The position was a series of fox holes rather than a formal trench system hence the use of barbed wire. The Italian positions are static and could easily be played by an umpire or as a solo game.

Italian Artillery can fire over open sights at any target they can see, if they have no target they will fire at random. Dice for one of the 12 squares on the British side of the table, take the centre of that square as the aim point and then randomly deviate by 2 x d10 inches, reroll for each gun.
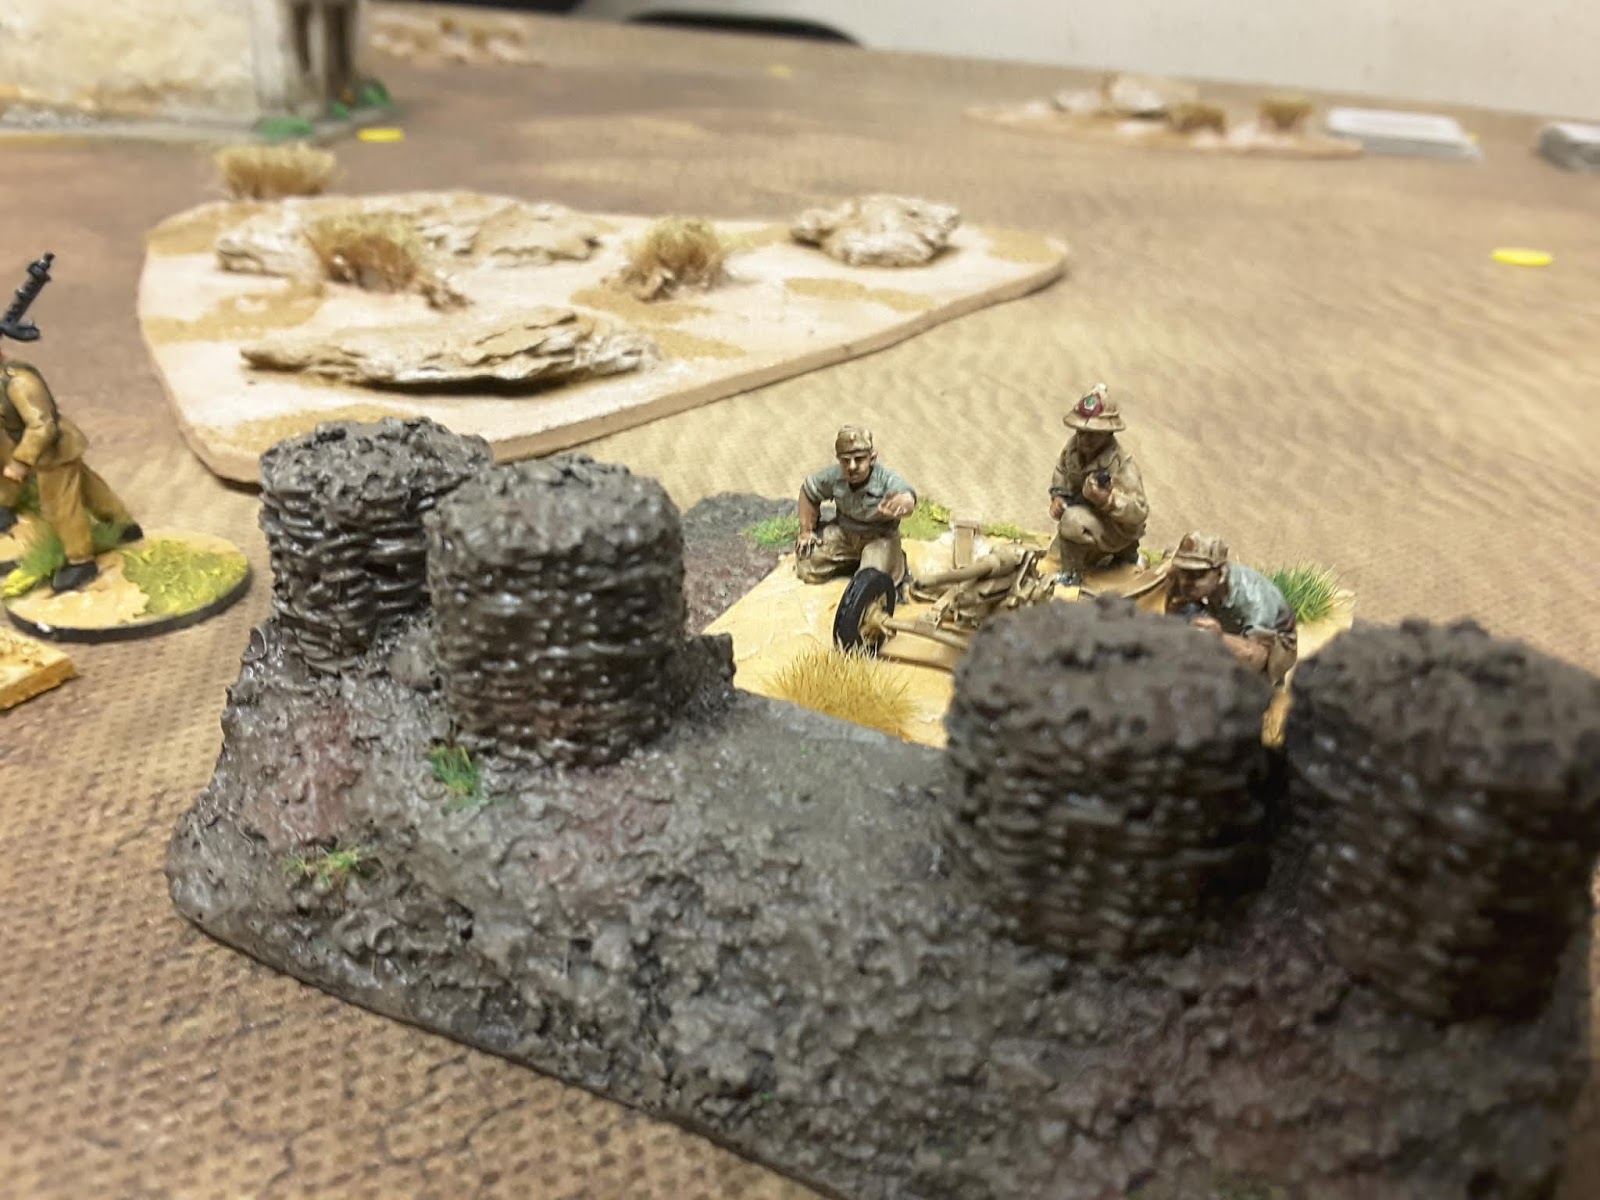

Italian AT Gun pretending to be a 65mm Gun behind a Renaissance Gabion, it's all accurate
How did we get on 

Once again a good time was had by all, these scenarios really throw up some interesting match ups and with the randomness of the rules players are definitely kept on their toes. The Visablity  rule worked really well and we all got the feel of a swirling sandstorm with targets frustratingly appearing and disappearing usually at the most inappropriate moment.


It's broke Sir
Round 1 went to the Italians without an initial shot being fired, "Hedgehog" one of the three Matildas broke down the first time it tried to move, the random roll produced an unfixable fault and that was it. Next turn the Italian Artillery landed a 100mm shell on the engine deck just to make sure.


The game settled down into a now you see it now you don't gun fight with the variable Visibility, the Brits taking quite a few casualties from the Italians in their fox holes and the randomly landing Artillery.


Things were going well until the tank Gremlin struck again, this time it was Mole in the centre of the attack, who broke down, it was fixable but with Italian small arms easily in range no one was getting out to fix it ! With the Artillery falling else where Mole quickly became a Pillbox, if only it had an AP round.


With the tank stalled, the British went headlong with fixed bayonets into the Italian positions. The Blackshirts held firm and held their fox holes, just.


But the fight drastically reduced the numbers of the defenders and next turn a fresh wave of British troops took the position.


The elation was short lived as the extra move forward revealed more Italians in the Hamlet.


On the British right the last mobile Matilda "Ratty" kept it's slow but seemingly unstoppable crawl towards the wire in front of it, rifles and LMG fire isn't much use against an Infantry Tank.


The Brits in the wire wisely decided to move away from the Hamlet and charged one of the Italian Gun positions, it fell but not without a fight.


The Italian Commander was busy on the radio, but no help came.


On the British left the tankless ("Hedgehog" smoking in the background) company had been wandering around blind for some time, the sandstorm preventing it from seeing anything of value, gradually the advance revealed that the Italian positions were not a straight line and the units moved to engage the flank positions.


The game built up to a nice close, the British had broken into the Italian positions in one location and a couple of others were holding on, however they had taken some pretty heavy casualties, three units had already been wiped out and it was touch and go if there was enough men left to do the job.


Everything came to a head in the final turns, on the right "Ratty" rolled over one of the Italian positions and with the gun position next to it taken that side of the table was taken.


In the centre there was another bayonet charge and again the first unit was wiped out at the wire whilst the remnants of the second one taking the position.


Whilst on the flank the British managed to roll over the 100mm Field Gun with hardly a shot fired.


The game ended when the Pillbox, sorry Matilda in the middle finished off the final Italian Gun and the British objective was complete, but not without considerable losses which were pushing 50% at game end.

So points wise I am going to give the Italians one (for the High casualties) and 3 to the British giving a Campaign Total of 18 to 10 in favour of the Brits.


Game 8 will be up soon, next time after a few games relying on the strength of the Matildas the British are back in the flimsy early Cruiser Tanks. But before then we will be playing on the fields of Edgehill and the Italian Wars Project will see the light of day again.

lunes, 23 de marzo de 2020

Locke Vs. Irusk2 #RockLockeInCoC


I was fortunate enough to be able to get a second game in last week, and I decided I want to start practicing my Convergence.

Since Friday was the release date for Crucible Guard, my FLGS had my preorder for Locke in and I was able to pick her up and assemble it that evening.  On Saturday afternoon I was ready to drop her into whatever my opponent brought. 

Honestly I think Locke is a better Convergence caster than she is in Crucible Guard, and frankly she's going to be more appreciated in CoC than CG because of her spell combination and what it brings to the table for us.  Hence the hashtag: #RockLockeInCoC

For my list I decided I wanted to run a TEP with her, despite the common opinion that it's best to run more heavies.  Part of this was that I've yet to play with a TEP at all and I wanted to see what it can do, but also because it gives us a strong Road to War trigger in that it can fire off at least two shots near guaranteed to kill something, possibly more depending on the matchup.

Here's what I went with:

Locke in Destruction Initiative
-Corollary
-Inverter
-Inverter
-Assimilator
-Cipher

TEP

ADO
ADO
Elimination Servitors
Attunement Servitors
Eilish
Optifex Directive

My friend Brian showed up with Khador and decided to try out Armored Corps:

Irusk2
-Spriggan
-Rager

Man-o-War Shocktroopers + UA
Man-o-War Demo Corps + Dragos
Man-o-War Siege Chariot

Man-o-War Drakhun
Man-o-War Kovnik
Kommandant Atanas Arconovich & Standard
Man-o-War Suppression Tanker
Kayazy Eliminators

We rolled for scenario and got the brand new Mirage, which is incredibly live.

Brian set the terrain around the table and I won the roll off, he picked sides.

Deployment, Mistakes, and My Turn 1

I didn't get a picture of the pure deployment, and after the game we realized Brian didn't take any advanced moves from his theme benefit. Neither of us thought it would have been particularly impactful to how the game played out given that I out threat his units by a decent amount and the fact that Locke doesn't need to cast Engine of Destruction to be able to easily hit the Man-o-War troops, especially if I play my Attunement Servitors correctly. This lets her hot swap around Red Line if necessary and with two Inverters that have chain weapons to ignore shield bonuses, further swinging things my way. 

Of note: Brian is proxying Sorcha3 as the Shocktrooper UA. 

I do however have a picture of my turn 1 after I ran everything forward:


I will likely put another post up expressly about how to deploy Locke and her Vector package so that she can cast all her upkeeps on turn 1 and still have the Corollary's free focus allow all the jacks to run turn 1, while ending things so that the Corollary can get the focus back at the end of the run/induction sequence.  There are at least a few other casters in Convergence who need to use the Corollary/Induction focus game to get their spells cast turn 1 while also ensuring the Corollary can be primed for turn 2. 

Brian's Turn 1


Brian runs basically everything up, though he keeps the Siege Chariot back a bit further than I expected. He is flanking hard with the Drakhun to threaten my TEP once it comes up to shoot. One mistake I think Brian has made was not positioning so that Irusk could cast Fire for Effect on the Chariot, though against Destruction Initiative the Siege Chariot is going to really struggle due to all my shield guards. 

My Turn 2


Pre-measuring shows me that I can safely get the Drakhun in range of the TEP while also staying back far enough to avoid the Shock Troopers. I configure the TEP to use 2 dice to hit, 4 dice to damage, and one extra shot.  Between that and one Elimination Servitor shot, the Drakhun dies. 

I also use the Assimilator to catch three Shocktroopers in a ground pounder, which was particularly effective since the Shocktroopers needed to run on turn 1. This put some damage into the unit while I managed to spike and kill one Shocktrooper outright. 

I position the Redline Inverter on the right to be just out of the Spriggan's 11" max melee threat. I position a servitor on both the middle and right flags to force contesting. I don't bother with the left flag since he doesn't have any solos close enough to take it and is already contesting in a way I can't meaningfully kill anyway.

I do however position two servitors on the left flank and shoot them with rough terrain from the Cipher to make things at least inconvenient for the Eliminators. I could have done better with placement.

Brian's Turn 2


Brian runs his Kayazy around the rough terrain to contest my zone. Atanas gives the Demo Corps pathfinder and they run/charge to clear a servitor and contest the center flag.  Irusk puts Artifice of Deviation on the lake and the Shocktroopers shield wall up.

The Siege Chariot takes a shot at my Cipher and I shield guard, however I do it to a servitor that is then in line to slam into on of my ADO's, which I was planning on to arc spells over to the Kayazy. Note for next time, pick better shield guard targets.

Brian of course feats this turn to slow down my reprisal, though he is unable to catch the TEP and Cipher in his feat.

Brian scores his zone but I'm able to score my right flag, so we tie scenario 1-1.

My Turn 3


Locke allocates two focus to Cipher and holds onto 5 to try and spell down the Eliminators. The Cipher takes its sentry shot with the POW6 blast at the Eliminators but it scatters far off of them.

The Optifex directive moves up and gets into my zone fully while also giving the Cipher and left Inverter pathfinder. Then I move on to Flare Time from the Attunement servitors: My left most Attunement servitor aims and is within 5" of the Eliminators. I manage to nail the 8 to hit and flare both Eliminators.  I then use another servitor to flare the Spriggan and another two servitors are able to flare the entire Shocktrooper units.

The Corollary fills to 3 Focus and transfers it to the Assimilator.  The Assimilator then moves its paltry 2" to get out of the TEP's way and drops shots onto four Shocktroopers via ground pounder.  I'm able to boost three damage rolls and kill two outright, damaging two others. This focus inducts to the Redline Inverter on the right.

This proc's Road to War for the right Redline Inverter and the left Inverter.  The TEP moves up and I consider just trying to spray the Objective down but I figure the Inverter should be able to pull that off.  I then start using 5 dice to damage shots into the cluster of three Shocktroopers still alive. After both shots I leave the UA on one box, and it passes its tough checks from Elimination servitor shots.

Locke activates and feats, moving 2" into the zone to get in range of the Eliminators. I boost to hit Bombshell on them and hit, then boost blast on the second Eliminator to....eliminate both of them and clear my zone.  With Solid Ground purified off, the Redline Inverter charges into the Spriggan (induct to Corollary) and puts a Macropummler + precision strike to take out the Cortex and knock the jack down. I then take two swings with the chain arm into the objective, killing it, and then take my last two  swings into the Spriggan (induct to the other Inverter), ignoring its shield and crippling its lance arm. 

I charge the left Inverter into the Demo Corps but only get one in melee (this inducts to the Corollary). This was the only one that was contesting the center flag however. I'm unable to buy more attacks and the focus sits.  I then use the Cipher to walk into the Demo Corps and start wailing, doing damage but not killing any models yet due to Sanguine Bond.

Once everything was done, I scored 4 points this turn: My zone, Brian's Objective, Center Flag, and the Right Flag.  Brian scores nothing and I'm up 5-1.

Brian's Turn 3


The Demo Corps get Vengeance moves/attacks which result in getting a crit stationary result on my Inverter, who then starts taking tons of damage. Luckily my Cipher gets missed by both Demo Corps.

Irusk allocates one to the Rager, then moves up and casts Battle Lust on the Demo Corps and cast a second spell that I don't remember, giving me two feat tokens that I put on my Cipher.

Dragos annihilates the stationary Inverter, but the other Demo Corps start missing/not doing enough damage to my Cipher to take any systems out.  The Siege Chariot impacts its way into the zone and takes a shot at my objective, which I shield guard to a servitor that doesn't slam into the objective.

Then Brian makes a mistake by using the Rager to try and attack my Inverter, using focus to boost damage rolls which then gives me more feat tokens which I put on the Inverter. Not much damage is done and to put insult over injury the Rager rolls a 2 and blows itself up.  What Brian should have done was run to contest my flag.

Brian moves up the Suppresion tankers and sprays down the servitors on my flags, but isn't close enough to contest.

Realizing his error he charges the Shocktrooper UA into the TEP, doing decent damage but not enough to kill it. Neither of us score any CP's this turn.

My Turn 4


To end the game I simply move an Elimination servitor up behind the lone Shock Trooper and use gun fighter to plink her to death. An ADO moves to my right flag and I win the game on scenario 6-1.

Conclusions

After the game we spoke about how the Armored Corps list was slow, and then we remembered he would have had advanced move on a bunch of models.

After writing the report it's clear this would have helped him more than we initially thought about the game. He would have at least been in shield wall for my turn two shooting instead of having had to run, or he would have been significantly closer to charging me.  The downside to this is that he potentially gets into my threat ranges with the Shock Troops who match up very poorly into Chain Weapon wielding Inverters.

The Siege Chariot ends up being effectively terrible in this match due to my high number of shield guards, and my winning the dice roll to go first really hurts on a scenario this live vs. a list as slow as his where he will be out threat significantly due to Road to War and Redline.  Since he's so low on DEF I don't need Engine of Destruction to hit, allowing me to cycle Redline easily which would punish him moving up enough for scenario.

I think Brian just needs a few mods to his list and he can be in a much better position for this game, though I'm not sure this kind of melee oriented Armored Corps wants to fight into #RockLockeInCoC.  Convergence guns can eat through Demo Corps and our best melee Jack can power right on through Shocktroopers shield wall.

As for evaluating Locke herself and CoC in general, I definitely liked the list.  I appreciated the amount of firepower I can bring to bear in a jack focused list design while also having a high enough model count to be relevant at least early on in scenario and being able to have a competent melee threat as well.  

I'm overall very excited to play CoC once the Scrum is over and enjoy the change of pace from Trolls. I think Destruction Initiative is very well positioned to excel in SR2018, and there may be some really strong play that can be done with a Prime Axiom that can create "free" servitors every turn to contest or score.  Similarly I think that if I owned all the Obstructors I needed there may be some game for Clockwork Legion as well, but that's a separate question that requires some testing. 

Finally, if you're playing Locke in Convergence, make sure to let PP know how much we appreciate her with #RockLockeInCoC